
Laps
All driven laps are listed here. Deleting and validating is possible. Clicking on the eye shows the telemetry data. On top you can search for a driver or filter track and cars.
Documentation for operators, technicians and editors — continuously updated.
All driven laps are listed here. Deleting and validating is possible. Clicking on the eye shows the telemetry data. On top you can search for a driver or filter track and cars.
Here you can see a list of all driven LAN races. The race result can be viewed, printed and shown on an external screen
all drivers who have driven so far are listed here.
by clicking the edit button for a driver you can edit name, e-mail and teamname for this driver
by clicking the eye symbol for a driver you can see some statistics and the qr-code for this driver
the card symbol shows only the qr code with the name of the driver
red merge button: let´s you merge this driver with another drivers data in case you have multiple drivernames for the same person or just want to merge drivers/laptimes
Here you can create and edit teams/teamnames for all drivers
here you can see a list of all active qr-codes
you can create a new qr-code by clicking on the + button on the upper right side, fill in the needed information and hit save down below.
to edit an existent qr-code hit the edit button next to a driver
the symbol button next to a driver shows the actual qr-code
here you can see a list of all your active rfid tags
you can create a new rfid tag by clicking on the + button on the upper right side, fill in the needed information and hit save down below.
to edit an existent rfid tag hit the edit button next to a driver
To create RFID Cards for your customers/drivers you need empty cards with an unique ID from Sim-Department. This cards can then be written/filled with data from your drivers. this will be the data that you created here and then get stored/saved on the card by a card reader/writer on the simulator.
here you can add favorites by clicking on the star next to a track
these marked tracks will appear first in the SD-Command by activating the "star"-filter
by clicking the pen/edit button next to a track you can edit the name of this track
you can group identical tracks with the group button
here you can find a list of all cars installed on your simulator
you can also see on which simulator the car is installed, in which category the car is placed, how many laps were driven in the car and the last time it was used
by clicking the edit/pen-button you can change the displayed name and category for the cars
you can also mark a car as favorite by clicking the star-button next to a car
in this area you can create car categories. (e.g. GT3, GT4, Drift, Street)
these categories can be used in the SD-Command as a filter for car selection and displaying leaderboards. each car can be added to multiple categories.
you can also create your own categorie by clicking the green + Button
you can see a list of all events and leaderboards you have created.
the created events and leaderboards can be displayed directly in the SD-Command screens section.
to create an event & leaderboard just hit the + Button on the upper right side.
name the event & leaderboard meaningful
now click through the sections and choose your track,car categorie and car
set the start date & end date - this describes the duration in which the event runs and corresponding driven times are displayed
type in the server ip from the server the event is running on
save the event & leaderboard
in the SD command/ Displays you will now see your created Event & leaderboard. You can configure on which of your available screens this new event & leaderboard will be shown.
here you can see the pre-configured driving-aid presets. these presets can be selected in the SD-Launcher and SD-Command.
you can edit every preset by clicking the pen/edit-button.
here you can configure your server templates. you can set up external servers also. you can edit each server by clicking the pen/edit-Button next to the respective server.
after editing a server hit the "save"-button.
To delete a server template here you need to uncheck that template in the SD command serverlist first.
a list of all available weathers.the weathers marked as favorite can be used directly in the SD-Command.
you can select your own favorit weather by clicking the "star"-button next to a weather.
here you can see all your saved controller presets.
best way to work with this feature is having the presets on your simulators named in a logical way. for example: automatic.ini, h-pattern.ini and paddle_shifter.ini.
you can now assign different controller presets to your simulators from within the command page if your customers need a special preset.
here you can see all your configured screens. you can edit them with alias-names and change the order in which they are shown in the SD-Command/Screens section.
to change the settings for a screen hit the edit/pen-button next to this screen.
here is a list of settings that define the appearance of your SD Launcher on the simulators, screens and registration page. you can edit every aspect like color, background or logo to your liking.
hit the save button after changing settings.
define the number of laps per track and car categorie in a quickrace. default value is 5 laps.
hit the + button to change the number of laps for a quickrace on a specific track or car categorie.
NOTE: THIS SETTINGS AREN´T ACTIVE AND HAVE NO EFFECT AT THE MOMENT!
configuration values. not all properties do have an effect to all installations. it depends on the installed theme and various individual settings.
change settings to your needs and hit the green "Save" button on the right next to the line you´ve changed.
PURE: If you want to use PURE and Custom Shaders Patch (3rd party weather implementation) on your Simulators we recommend using PURE 2.60. CSP should be ver 0.2.11 or 0.2.12 (paid version).
Note: PURE and CSP must be installed on all your simulators!
a list of logfiles for internal usage and bug fixing.
by clicking on the eye symbol you can view a logfile.
by clicking on the download symbol you can download a logfile.
here you can define the settings for the registration page for drivers. you can determine terms of use, a clickable checkbox and an e-mail form if you want to.
you can edit and configure the appearance of your registration page in the Admin/Theme section.
you can set an option to print out the registered drivers qr code.
show your registration page on a webbrowser: ip adress of your NUC/register. for example: 192.168.1.123/register
after changing settings hit the save button.
shows all of your installed simulators and their configurations. editable by a click on the action button
only for maintenance by Sim-Department
export your database and driverslist as backups here.
Software Update Page
Hit the "Execute update" Button to get the latest version.
a list of all driven sessions
A list of all Games & Simulations - Used for session statistics
The customer groups can be assigned to the driven sessions. The simulator usage can then be evaluated according to these groups.
you can assign controller presets to customer groups.
statistics of the usage from the simulators.
you can set specific time-based periods to have a detailed overview about the usage.
Because all communication between the individual components is based exclusively on IP addresses, the following components must be given a static eIP address:
All other components (simulators, command PC, monitors) do not need a static IP address.
To enable a flawless communication, all windows computers must be in a private (not public) network profile.
The NUC is shipped already completely installed. You only need to adjust the IP address to get a static address. You can either do this in the NUCs settings, using the gear icon in the upper right corner of the NUCS desktop, or set the static address in your router.
Then open the admin area of the NUC. Enter the IP address of the NUC in a browser following /admin. e.g.: http://192.168.0.10/admin
In the admin area go to Administration > Updates. Here you can always install the latest version of our software.
Our launcher must be installed on each simulator. In our installer, you must first specify the path to the Assetto Corsa installation. If you want to use the Steam version, and it is installed in the default path, it will be detected automatically.
Enter the (static) IP address of the NUC server under Sd Tracking Server IP. Under Servermanager IP you have to enter the (static) IP address of the PC on which the sdServermanager is installed. If you don't want to use an sdServermanager (or the address is not sure yet) this field can be left empty. You can add the data later in the settings.
Under Sim-No you have to enter a unique number. Each simulator must have its own unique Number.
The default drivername is the name that is permanently assigned to a driver at this simulator if no other name is specified.
If you are using a triple screen setup, select the appropriate setting under Screen, or specify your setup. If you are using only one monitor, leave it set to single screen.
To install, click the "Install" button.
A desktop icon will be created automatically. If the application does not start correctly, install the necessary .NET Framework. There is a button in the installer for this.
If the application does not start correctly after installing the .NET framework, try to install the current Edge browser by clicking on the appropriate buttons in the installer.
To set up a monitor you need to open the following URL in a web browser:
IP address of the NUC /screen. e.g.: http://192.168.0.10/screen
Then enter a unique name for this monitor/screen.
You can save the URL that is called afterwards as a bookmark.
Use either the browser of your smartscreen, or a browser in fullscreen mode (usually CTRl + F11) on any PC.
If you have problems with your browser/smartscreen, you can also use a Raspberry Pi. We also offer ready solutions for this.
For the command pc you only need a webbrowser. Open the following URL:
IP address of the NUC PC /command. e.g.: http://192.168.0.10/command
Here you can manage all your simulators, monitors and servers.
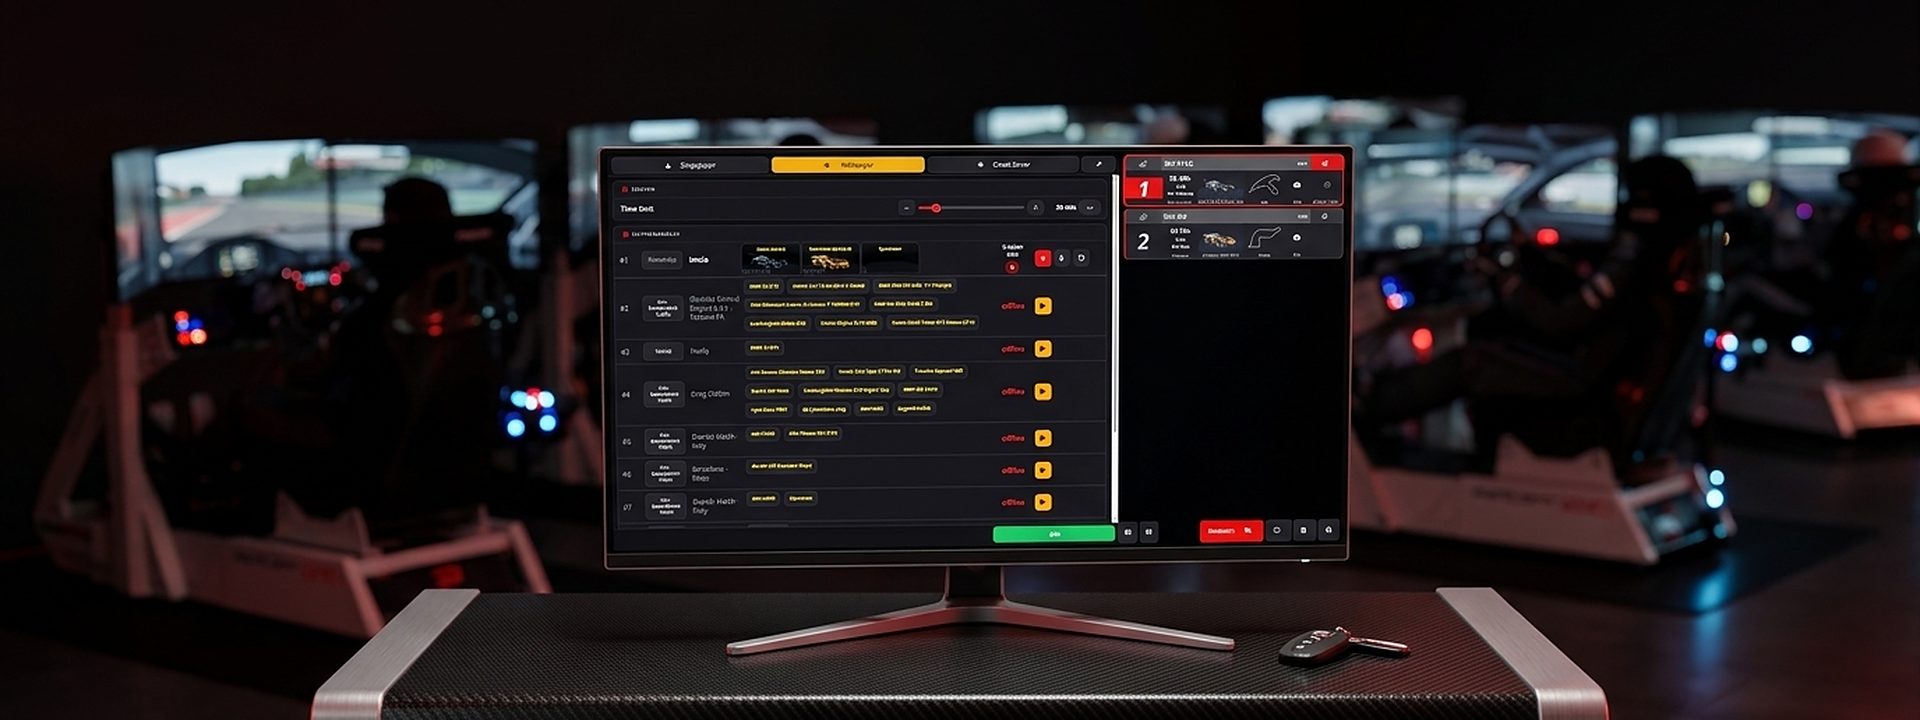
select a mode for the next session. you can choose from 3 options - Practice, Hotlap and Quickrace.
for each mode you can set additional parameters and driving aids like weather, time of the day, AI Strength and temperatures. you can set pre-defined driving aids presets and set specific driving aids features to your needs.
Practice Mode - a timed session to learn the track and car
Hotlap Mode - a timed session where you want to set the fastest time
Quickrace Mode - a timed race against AI opponents. set up parameters like number of opponents and opponents strength before you start the race
Event - if you have created an event in the Admin Section this events will be shown here. You can set simulators directly on this events by clicking the SET Button. You can also Lock the Settings for the simulators by clicking the LOCK Button.
set a time limit for the next session. the SD Launcher will end the session immediately at the end of the elapsed time.
you set the time limit either manually with the +/- buttons or you click on the clock symbol and select a predefined time limit there. You can also set the timelimit off.
here you can see 4 predefined settings for the driving aids.*
Beginner - usually needs all driving aids available
Racer - has some experience , needs driving aids like abs, tc etc.
Pro - experienced in driving on simulators, needs a few driving aids
Expert - very experienced, doesn´t need driving aids
Apart from the default settings in the presets, it is always possible to manually add individual settings for the set parameters.
a set of 12 driving aids that helps the driver with additional features. you can enable/disable them with a click on the belonging button. some aids can be increased or decreased in percentage levels. Others have just on/off settings.
Ideal Line - shows the ideal line. The ideal line helper is a colorized representation of the racing line. a green line indicates acceleration zones, a red line indicates braking zones.
Auto Blip - autmatically increases the revolutions per minute of the motor while the clutch is pressed to engage gears.
Auto Brake - is a driving aid that helps braking. Useful for unexperienced drivers.
Auto Shifter - switches the transmission from manual to automatic shifting.
Auto Clutch - engages the clutch automatically for shifting gears.
Tyre Blankets - pre-heat the tyres before going out on track. that helps with performance of the tyres right from the start.
ABS - anti-lock braking system is an electronic helper in most cars nowadays. it prevents the tires from locking up when braking.
TC - traction control prevents the wheels from spinning or the car spinning out of corners. Very useful in wet conditions. Most modern racing cars use TC.
Stability - electronic helper to stabilize the car.
Damage - the level of damage in the simulation. can be set from 0% to 100% in steps of 10%.
Fuel Rate - the amount of gas consumption. can be set from 0 up to 3x in 3 steps. usually it is set to 1 because 1 corresponds to 100%.
Tyre Wear - the rate of tyre wear in the simulation. can be set from 0 up to 3 in 3 steps. usually it is set to 1 because 1 corresponds to 100%.
a set of weathers for your driving session to choose from. these preset weathers are your favorized weathers you set in Admin/Content/Weather in the SD Software. the more weather you favor in the SD Software, the more weather you have as a preset to choose from in the simulators.
you can set 2 temperature values for the session. values are given in degrees Celsius. normally the road temperature is higher than the ambient temperature.
Ambient - the actual air temperature
Road - road temperature
this value represents the time of day on track at the start of the session.
you can set the desired time of day in 30 minute increments by clicking on the +/- button.
lets you choose from 4 different settings for the AI strength.
the amount of AI opponents in the session. you can set up to 12 AI opponents by clicking on the +/- buttons.
determines whether the selected settings should be displayed on a monitor or VR glasses.
Note: to get this switch to work properly you need some preparation!
1. Set up your desired view for driving Assetto Corsa with a screen in the game itself or use Content Manager to do so. A configuration file called video.ini will be stored in C:\Users\your_name_here\Documents\Assetto Corsa\cfg.
2. copy this video.ini and paste it into the following folder: C:\sdAcLauncherApp\presets. Rename the file you just copied to video_screen.ini.
3. now go back to Assetto Corsa or Content Manager and set up the view for using the VR Headset. Assetto Corsa will write a new video.ini in C:\Users\your_name_here\Documents\Assetto Corsa\cfg.
4. copy this video.ini and paste it also into the following folder: C:\sdAcLauncherApp\presets. Rename this just copied file in video_vr.ini.
Recommendation: AC is working with just one video.ini. with this method the last saved view in AC is the setting for VR headset view as main view. to set up the monitor on your simulator as main view you should have the video_screen.ini as video.ini in the following folder: C:\Users\your_name_here\Documents\Assetto Corsa\cfg. so please copy the video_screen.ini to a safe place (desktop) and rename it to video.ini. then copy it into C:\Users\your_name_here\Documents\Assetto Corsa\cfg. In this way you are making sure that the monitor/screen setup is the main view and switching to vr headset via command is optional.
set a time limit for the multiplayer session. the SD Launcher will end the session immediately at the end of the elapsed time. you set the time limit either manually with the +/- buttons or you click on the clock symbol and select a predefined time limit there. You can also set the timelimit off.
shows a list of all external servers in your network. These servers need to be set in the Admin--> Content/Server section with ip adress, port and password.
select a mode for the multiplayer session. you can choose from 3 options - Practice, Hotlap and Quickrace.
for each mode you can set additional parameters and driving aids like weather, time of the day and temperatures. you can set pre-defined driving aids presets and set specific driving aids features to your needs.
Practice Mode - a timed session to learn the track and car
Hotlap Mode - a timed session where you want to set the fastest time
Quickrace Mode - a timed race against other drivers
each mode has its own timer. the timer sets a limit of driving time that closes the session right after the time limit expires.
click on the clock symbol to set a pre-defined time limit or use the +/- buttons to set a time manually.
here you can see 4 predefined settings for the driving aids.*
Beginner - usually needs all driving aids available
Racer - has some experience , needs driving aids like abs, tc etc.
Pro - experienced in driving on simulators, needs a few driving aids
Expert - very experienced, doesn´t need driving aids
Apart from the default settings in the presets, it is always possible to manually add individual settings for the set parameters.
a set of 12 driving aids that helps the driver with additional features. you can enable/disable them with a click on the belonging button. some aids can be increased or decreased in percentage levels. Others have just on/off settings.
Ideal Line - shows the ideal line. The ideal line helper is a colorized representation of the racing line. a green line indicates acceleration zones, a red line indicates braking zones.
Auto Blip - autmatically increases the revolutions per minute of the motor while the clutch is pressed to engage gears.
Auto Brake - is a driving aid that helps braking. Useful for unexperienced drivers.
Auto Shifter - switches the transmission from manual to automatic shifting.
Auto Clutch - engages the clutch automatically for shifting gears.
Tyre Blankets - pre-heat the tyres before going out on track. that helps with performance of the tyres right from the start.
ABS - anti-lock braking system is an electronic helper in most cars nowadays. it prevents the tires from locking up when braking.
TC - traction control prevents the wheels from spinning or the car spinning out of corners. Very useful in wet conditions. Most modern racing cars use TC.
Stability - electronic helper to stabilize the car.
Damage - the level of damage in the simulation. can be set from 0% to 100% in steps of 10%.
Fuel Rate - the amount of gas consumption. can be set from 0 up to 3x in 3 steps. usually it is set to 1 because 1 corresponds to 100%.
Tyre Wear - the rate of tyre wear in the simulation. can be set from 0 up to 3 in 3 steps. usually it is set to 1 because 1 corresponds to 100%.
a set of weathers for your driving session to choose from. these preset weathers are your favorized weathers you set in Admin/Content/Weather in the SD Software. the more weather you favor in the SD Software, the more weather you have as a preset to choose from in the simulators.
this value represents the time of day on track at the start of the session.
you can set the desired time of day in 30 minute increments by clicking on the +/- button.
Theme: lets you sync the theme you created in the Admin section with the simulator.
Content: you can sync your content (tracks and cars) from the simulator with the NUC.
Config: sync settings you made in the Admin section with the simulator.
Screensaver: starts the installed and chosen screensaver on this simulator immediately
Update: starts to update the SD Launcher on the simulator if an update is available. Note: the zip extractor on the simulator needs to be confirmed to finish the update completely.
Exit: closes the SD Launcher on that simulator
Shutdown Windows: closes windows and shuts down the pc
Execute Command: starts or exits an application you configured in the SD Launcher of the simulator. you can configure up to 5 apps.
Default: resets the driver name on the simulator to the default driver name.
list of all your available controller presets.
select a simulator and then select the controller preset you want to use on that simulator.
note: you need to activate "allow controller preset selection" in the SD Launcher on the simulator. F2 key on the keyboard to open the config menu. enable the feature in menu Assetto Corsa.
chose what kind of video preset you want to use on a simulator.
select a simulator and set a video preset for that simulator.
Disabled: Disables all Auto Exit features. The simulator will stay in the session till you manually end the session.
Finish Lap: After the set time has elapsed, the driver can finish his current lap. As soon as he crosses the finish line, the session ends.
Time: When the set time has elapsed, the session is ended immediately. The current lap cannot be ended.
note: a race always ends immediately after the chequered flag and the simulator comes back to the main menu except the Auto Exit is set to "disabled".
shows all the options and parameters for your upcoming session.
this is the page where you select a car for the upcoming session. the list of cars includes all the cars that are installed on your simulator.
you can filter your cars by car classes like GT3 and Prototype, you can select a favorized car or simply scroll down through the list and set the car you need.
this page is for setting up a track for the upcoming session. the list of tracks shows all the tracks that are installed on your simulator.
you can filter your tracks by country names, you can select a favorized track or scroll down through the list and set the track you want to drive on.
the START Button for the session you created.
shows all connected simulators in your network.
shows all monitors and screens connected to this simulator.
you can select each individual display and decide what is displayed on it in the actual session.
you can see a list of your active simulators and can put them in one of 5 Voicechannels from here.
Just click on the simulators you want to put in one channel and click on the channel to put them in.
You can see the channel number in the simulator boxes in which channel they are set.
shows a list of all connected simulators and screens in your network. in addition you can see the ip adresses of the server manager,the screens and the simulators.
Basically, the credit system is a way to load money or time onto a user/customer account and then use it on a simulator. The customer buys a quota of credits (minutes or credits), uses them to top up their customer account and then has the option of using this quota in your Simcenter or on one of your simulators. This results in countless possibilities for using this system. Either as a standalone solution at trade fairs or in shopping centers etc. or as extended use in your Simcenter.
QR Code Scanners or RFID Chipcard Readers for scanning the QR Code or RFID Chipcard of customers
your customer can buy driving time in minutes or credits at your local simcenter or online on your Simcenter24 website. the minutes or credits purchased are loaded and credited to the customer account. The customer now has the opportunity to log into one of your simulators and use up his driving minutes. you can set up the customer with his desired car/track combo and set a session to his likings with a fixed amount of driving time or the customer can decide how long he will be driving and only the amount of remaining credits limits the driving time.
the new screen/display has to be in the same network as the simulators etc.
- connect the new screen to the NUC via cable or wi-fi
- open a webbrowser on the new screen. type in the adressbar: ipnuc/screen (eg. 192.168.10.12/screen)
- a new window will appear. name your screen and hit open
- now you see the standard statistics screen in a new window
- make that new site a favorite in your browser and make it fullscreen
Now you can decide and chose what is shown on that screen from the command page on your controller pc.
have a look on our Tutorial Video here:
[1]
Admin → Floor plans. You can create several plans (e.g. one per room).
Assign a plan to a display from the Command page → Displays: pick the view Floor plan, then choose which plan that screen shows ("None" clears it). See Screen Layouts.
There is also a direct kiosk URL for a single screen: ip/screen/floorplan.php?name=<screen name>.
The screen shows the room picture with the markers and a header like "5 free · 3 occupied". Colours are guest-friendly: green = free (you can sit down); occupied and "starting" (loading) count as busy. Occupied simulators can show a live countdown of the remaining session time.
See also: Screen Layouts, External Screens.
The car a driver picks decides the role — not the name. The default assignment is:
Cop and runner cars are configured per server in the Server Assistant. Several cop/runner cars are possible; all other cars remain the AI traffic environment.
Takedown: the cop fills a takedown meter on the runner by staying close (within the catch radius, faster the closer he is) and by ramming. The meter drops again after a short grace period once the cop loses the runner. At 100 % the runner is busted.
All values are configurable per server in the Server Assistant.
Create it with the Server Assistant (Admin → Wizard), mode "Hot Pursuit". Pick the cop and runner cars, set countdown / head start / cop delay, the catch radius and the points. Only layouts with a traffic spline can run Hot Pursuit.
to enter the configuration mode hit F2 key on your keyboard
hit F3 Key to cycle through different Launcher language settings. you can change to english, german, dutch and japanese right now.
these are the standard settings of your simulator. you can change the appearance and game modes, lock game modes and enable error logging.
Main View: determines the main view of the simulator. you can choose what kind of mainview is displayed.
Overview: is the standard view for the SD Launcher
Event Caroussel: shows a startscreen with all your events in a caroussel mode. needs working controller key bindings to control the functions of the Launcher
Main Menu: simple startscreen with singleplayer and multiplayer functions to chose from
Arcade: special arcade setup where the driver is able to just race a pre set up car/track combo. mostly used as standalone solution
Welcome: shows the name for the next customer on the startscreen
Theme: enables a theme and colorscheme you want on your simulator. a theme can be set in Admin/Theme in the SD Software and is available in the launcher as "Default" after the theme has been synced.
Language: you can switch the language for your simulator here. more languages coming soon.
URL:
Mode:
enable error logging here.
Please note: Don´t forget to hit SAVE after changing any settings.
Autorun on windows start - switch this button on if you want the SD Launcher to start with windows
Default Name: is the default name of your simulator.
Reset Name after Session is a switch. you can set it so that the drivername will be resetted to the default drivername after a driven session and the simulator goes back to the main menu.
Default Time: is the default time of any session on that simulator. it determines the lenght of any race, hotlap or training session without setting up a specific time. default time is set to 600 seconds/10 minutes.
Race Overtime: is the time the session is ending after the set timelimit for a session has expired.
Additional time: is the time that is added to the session time limit so that loading times and possible delays do not affect the booked driving time for the customer.
Type: you can chose what kind of screensaver you want to show on your simulator when it is not in use.
1. Disabled: The Screensaver is disabled and wont show up.
2. Blackscreen: The Screensaver is a blank black screen.
3. Tracks: animated car on various trackmaps will show up.
4. Images: pictures or screenshots of your choice will be shown. you have to copy those pictures on every simulator in the following location/folder beforehand: C:\sdAcLauncherApp\htdocs\screensaver\images
5. Video: show a video of your choice as screensaver. the videofile has to be named screensaver.mp4. the video file you want to show has to be copied to C:\sdAcLauncherApp\htdocs\screensaver\
6. Tutorial: show a tutorial video on your simulator right after the driver has pressed the throttle pedal or the OK Button on the steering wheel. tutorial video only works in Event Caroussel Mode for now!
Show Screensaver at Session End: switch on if you want to go in screensaver mode directly after a session has ended no matter what time in seconds you set in the timeout field.
Lock Screen: if set to ON the simulator will go in Locked Mode and you can´t control the simulator with the connected steering wheel or assigned button box etc. Only a qr code scan/rfid chip scan for a new driver or the operator on the command page can unlock the simulator.
Timeout: is the time in seconds after a session or the simulator is unused before the screensaver starts to work.
follow these steps to make the tutorial video feature work:
1. copy your tutorial video file to C:\sdAcLauncherApp\htdocs\screensaver. make sure your file is named tutorial.mp4
2. start your SD Launcher and hit F2 to open the configuration menu.
3. go to General -> Screensaver and set it to Tutorial. Set the Timeout to 0 and enable "Show Screensaver after Session has ended". Unselect "Lockscreen"
4. go to Controls -> select “Steering + Accelerator + Brake”, select your preferred icon set in the next fields (steering wheel type and pedalset)
5. go to Timers -> set your needed timeout values and hit the SAVE button on the bottom of the screen.
you can chose what to lock. a specific game mode, car, track and difficulty level or all together. you can set a password to unlock these settings. These chosen settings will be locked if you hit the lock button in the command page as operator.
The Lock/Unlock command can be sent directly by clicking on the lock symbol in the simulator in the command site [[1]]
When the lock option is clicked in the command for a simulator you will see a startscreen like this on the simulator. all previously locked options will have a red lock and are now unchangeable for the driver.
Assetto Corsa related settings on the left side, switches to enable assetto corsa apps on the ride side
AC Path: the install path to your Assetto Corsa Folder. Make sure the path is correct.
Start Command:
Send Autostart when AC is ready: sets the driver directly on track instead of sitting in the pit menu and click DRIVE manually.
Send Autostart on Session Change: sets the driver directly on track instead of sitting in the pit menu and click DRIVE manually. this setting works also between session changes. e.g. practice -> qualifying -> race
Send Autostart Delay: is the delay time to get the driver on track after the session has started.
Send Launcher to background delay: is the delay time the launcher goes back to the mainview after the session has ended.
Set AC topmost: forces AC on top off all shown windows on screen
Allow controller-preset selection: Enables and shows a controller-preset selection on the mainscreen in main menu.
Load 1st Setup (Experimental): if this option is enabled the first car setup in the car setup folder will be loaded automatically. this can be useful if you want to make sure everyone is running the same car setup on a specific track. maybe you want to load a rain setup or a hotlap setup etc. we are in the testing stage for this feature. GUID: shows your Steam ID if available.
here you can integrate devices to control the launcher. For example, you can assign the buttons on the steering wheel to control the launcher.
assign the needed buttons on the steering wheel of the simulator. most common would be the OK/Start Button to let the driver start the session.
you can now create colormatching buttons (real steering wheel -> SD Launcher) by clicking on the icon symbol and recreate the appearance of the real buttons from the steering wheel in the SD Launcher.
Request Assistance
you can now assign a button on the steering wheel of the simulator to let the stuff/employees know that a driver needs assistance on the simulator. if the driver in the simulator hits that button then a small bell icon will appear in the command screen for the operator.
Don´t forget to hit the SAVE Button after changing settings.
these are timeout settings in seconds that can be set to your needs. you can chose how much time the player has to make his settings while configuring his sessions.
Event Selection: timeout in seconds before the launcher goes back to the main menu
Event: AI Difficulty or Multiplayer: timeout in seconds before the launcher goes back to the main menu
Multiplayer: Wait for other drivers: timeout in seconds before the launcher goes back to the main menu
Result Screen: time in seconds how long the result screen after a session will be shown. a countdown is visible also
Tutorial Video: time in seconds the tutorial video will be shown if activated in the screensaver settings
SDTRACKER/NUC
Use SD Tracker: standard is on. switch that button to off if you´re using the simulator as a SPECTATOR or the sim is working in Standalone Mode. e.g at a fairy etc.
IP Adress: put the ip adress of your NUC in here.
Sim #: put in a unique number for your simulator. this number also shows up on your simulator in the command screen.
Do not send Live data: if switched on the simulator won´t send laptimes to the NUC. useful for SPECTATOR use. the sim doesn´t appear on livemaps also.
SYNC
Settings: syncs settings made in the Admin/Configuration panel to the simulator. e.g Events, Series etc.
Theme: syncs the appearance/theme that you´ve created in the Admin/Theme for the simulator.
Content: sends the installed content (tracks, cars, controller presets) from your simulator to the NUC.
QR READER
Com Port: is the port where your qr code scanner is connected. must be a com port! You can find the port number in Windows in the device manager. If you´re installing a qr code scanner then set the scanner in com port mode. mostly this will be done with a scanned code from the scanner manual.
Encoding: UTF-8 is standardsetting. you can test the functionality of your scanner here.
Unlock Code: put your unlock code in here. you´ll get that code from SD if you´ve purchased the fitting package.
RFID
Pc/Sc Reader: if the RFID Reader is connected directly to the simulator you should see and chose the connected device in here.
PAYMENT
Required: let´s you decide whether you want to activate the Creditsystem or not. If you want to use the Creditsystem you´ll need to make additional settings in the Admin/Configuration. You can set the amount of credits used per minute or session.
Limit session time to available credits: a simple switch that sets up a limit of the session times for a driver depending on the amount of credits that driver has in his account.
shows extra settings for your screen if you want to set up a custom resolution or a vr screen for your simulator.
Width: type in the width you need for your screen
Height: type in the height you need for your screen
Top: defines the pixel position of the top of your screen
Left: defines the pixel position of the left of your screen
Note: If you have a triple screen setup that is run by Nvidia Surround or AMD Eyefinity and set up as 1 screen it can be helpful to setup your left monitor as monitor 1 and recalibrate Nvidia Surround/AMD Eyefinity. Always on top: switch to make sure that AC is running on top of all applications on your screen. that means AC is always the top layered app. keep in mind that in some cases when you want to bring up another app like Task Manager etc. this setting is not useful because you can´t see it anymore.
Border: runs AC in Border mode
Enable VR: switch to enable a VR
VR is default: switch to set VR as default
shows the ip adresses of your Server Manager, your simulators and external servers. you can edit and add new ip adresses here.
Server Manager: The correct IP address of the PC on which the Server Manager is installed must be entered in this field in order for the software to function correctly. You can edit or set a new ip if needed.
Simulators (VS Mode): shows the ip adresses from other simulators in the network. you can edit and add simulators here.
External Serverlist: ip adresses from external servers you want to join with your simulator.
Please note: Don´t forget to hit SAVE after editing your settings.
Mumble client exe path: this is the line where you set your path to the mumble client.exe on your simulator. be aware of special signs! the path has to be a clear path like: C:\Program Files\Mumble\client\mumble.exe
Username: keep it blank to use the Username set in your mumble client
Alternative Server ip: write down your server ip and port if you´re using another mumble server than the simdepartment server
In here you can configure your system to send signals to an external receiver to control different effects. this is mostly used for LED lights on your simulators for example.
this feature is used to start different applications on your simulators from the command page. There are countless possibilities: e.g. playing videos on the simulator, controlling motion platforms, controlling lighting effects, displaying driver names/vehicles on separate monitors, etc.
As an example of one possible application, we briefly describe the use of video files as tutorials on your simulators.
You´ll need to create a new folder in your SdAcLauncherApp installation folder. path: C:/sdAcLauncherApp/htdocs
name that new folder "video".
paste your video files in that new video folder
open the SD Launcher on your simulator and hit F2 to reach into to configuration menu. click on the Start Commands sub menu
set video as Command and type in the filename of the video file you want to show under Argument
save those settings and restart the Launcher.
Now you can start the video files from the Command page by clicking on App 1, App2 etc.
shows the license of the SD Software and available features
shows the actual version of SD Software you are running and lets you update to the newest version if an update is available.you can downgrade as well if needed.
in case you need support you can start Rustdesk here.
Rustdesk is a free remote desktop software that we use to gain access to your simulator/PC
you can see your ID along with your password below on the left side. place your mouse over the eye symbol next to the password to make it visible.
AC_TELEMETRY); the live dashboard additionally needs AC_TELEMETRY_DEEP. Turning deep telemetry on requires a restart of the screen/websocket server.Command → Displays → view Telemetry. Pick up to two connected simulators from the list (only currently-running rigs appear). Deep telemetry is only collected for the rigs selected here. See Screen Layouts.
Per simulator: driver and car; current / last / best lap and lap count; a large speed + gear readout with a rev bar and shift lights; a throttle/brake trace; pedal bars; the real track outline with a moving car dot; a top-down car with per-corner slip colouring; a steering gauge; a G-force meter; and ABS / TC / limiter / pit flags.
Some thresholds are configurable in Admin → Configuration: redline RPM, steering range, and the slip-angle warning/critical values for the corner colours.
Separate from the live view, the driver portal can chart the recorded telemetry of finished laps. From Info → Laps, open a lap's telemetry to see the track map plus graphs for speed, throttle, brake, clutch, gear, RPM, steering and fuel; several laps can be overlaid to compare. Recorded laps arrive automatically from the launcher (each finished lap is uploaded with its telemetry, and — if Simcenter24 sync is active — pushed online too; see Sync).
See also: Screen Layouts, Sync.
Basically, the feature is a way to let multiple drivers form a group in your command page and let them drive together on a VS Server. They can also be send to a multiplayer server together.
you need to create a new configuration entry in your NUC/administration/configuration menu. Scroll down to "other configuration and hit the green + Button create the entry as the following
entry: update_key value: DEV
hit the save button on the right side to that new entry.
you can now create groups by marking multiple simulators in your command page and hit the new "group" icon right below the simulators. you can also create groups by selecting drivers from the name list and hit the people symbol right below the simulators.
grouped simulators appear now framed and you can decide to make settings on a single simulator or set them up all in once as a group.
go to "create server" and choose which sessions you want to drive, which track and cars. the stanadard setting for car selection is set to a car choice made by the operator. you can preselect a car for every simulator.
if you tick a car category drivers are able to select their favorite car from those categorie/s by themself on the simulator. hit the green init server button and the server will be startet. every player can now select his car and when all drivers are finished selecting the server will start.
you can buy that website from Sim-Department as a package. Please contact us to talk about what exactly you may need.
after purchasing your package you´ll get your Admin Account and an Online Token that will be put in the NUC´S Admin page to publish your Events and Leaderboards.
shows actual news or updates that you put in on your own in the backend. it´s the starting page of your S24 registration page
here you can show actual, upcoming and past competitions or events to your customers.
these events are created in the Admin page under Events & Leaderboards.
This is the registration page for new drivers and customers.
an account on the S24 registration page will be created.
drivers/customers can log in and show data like their own ranking, driven laps, leaderboards etc.
this is the place to book a session or package in your center
customers can book pre-created packages or driving time
multiple payment methods to choose from
is an optional feature for your registration page where you can create a league tool with a lot of different features
let´s talk about it if you are interested in that feature
leaderboards for all your tracks are shown here
this is the login screen for the admin and drivers to log into the created account
you´ll need to login as admin into your account to change settings, content, appearance of your S24 Registration page
you can change almost anything to your needs
here you can create any news, updates or posts you want to let your customers know about
this menu shows all your events and competitions you´ve created in your Events & Leaderboard section on the NUC´s admin page (Content menu)
these created events need to be uploaded by clicking the publish button next to your created events
this is the place where you put in all the neccessary infos/data to display your legal disclosure
Admin → Screens manages your displays: alias name, display order, orientation, font size and leaderboard style. Grouped / multi-display setups are managed here too.
In short: select screen card(s) → choose a view → tune its settings; the commands fan out to the chosen screens over the network.
See also: External Screens, Floorplan, Live Telemetry, Traffic Score, Hot Pursuit.
Every car picker (sims, traffic, and for Hot Pursuit cop/runner) has a search box and a category dropdown (GT3, GT4, Street, Classic, LMP, DTM, Formula, …). Picking a category narrows the list; typing narrows it further; "All categories" shows everything again.
In Hot Pursuit mode two extra pickers appear — cop cars and runner cars — plus the round settings (countdown, runner head start, cop start delay, catch radius) and the points (runner points/sec + escape bonus; cop bust base points + fast-bust window & points/sec). Whoever picks a cop car is police; whoever picks a runner car is a fugitive.
For traffic servers (and Hot Pursuit) you set the number of AI slots and the traffic density; an "Advanced" section offers fine settings (speed, variation, distances, two-way traffic, hide AI names, daytime lights, …).
The admin classifies each layout's AI spline (traffic / racing / single / none) and shows it as a badge; only traffic-capable layouts allow the AI-traffic modes.
In the template list (Admin → Content → Servers) each row has an "Edit in wizard" button. It opens the assistant fully pre-filled (track, mode, cars, settings, points, weather). Saving updates the existing template; unknown config sections are kept.
Two limitations of the reverse mapping: in plain traffic mode the "sim vs. traffic cars" split cannot be reconstructed afterwards (the template stores one combined list); rain is not read back. Everything else is restored correctly.
The assistant writes mode-specific settings as pass-through sections into the template. At server start they are translated into the real configuration and the section is removed again:
See also: Hot Pursuit, Traffic Score.
Purpose: catalog the content files on a mounted drive (e.g. a USB / exFAT volume) so they can be listed and downloaded.
Purpose: push this center's data up to the Simcenter24 cloud. Available when a Simcenter24 online token is configured.
Note: the exact online hosts and tokens are configured by Sim-Department; treat them as internal settings.
See also: Live Telemetry, Admin.
Also recorded: top speed and driving time. Ranking is by raw points plus a points/minute figure.
The display is a local app on the simulator (folder assettocorsa/apps/lua/TrafficScore). It shows an animated score, the multiplier as a badge, the overtakes/contacts stats and a traffic-density bar, with +/− popups on events (overtake, near-miss, contact).
Identity is the driver name (the connection name), not a Steam ID — so the in-game name must match the driver account.
Events (time-window / track) can be set up as Admin favorites and assigned to the screens (see Admin → Content → Events & Leaderboards).
Create it with the Server Assistant (Admin → Wizard), mode "Free roam with AI traffic". Only layouts with a traffic spline can run traffic; the assistant shows the AI status of each layout.
[[1]]
[2]
[3]
[4]
[5]
[6]
[7]